

It looks great in your safe, then the first buyer calls it “Good” and offers way less than you expected. Or you post a listing, spend an hour answering questions, and still get slow replies because nobody trusts the description you’re trying to write in plain English.
You want a fair, defensible way to describe what you’ve got. You also don’t want to oversell it and get hit with returns, complaints, or awkward back-and-forth once someone spots a flaw you didn’t mention.
The fix is using a shared language the market already recognizes. The most widely used set of standards for grading firearms condition is the one defined by the NRA many years ago, and a lot of listing and pricing language mirrors that same wording, like “Excellent” and “Very Good.”
Overestimating happens to honest owners because “clean” does not equal “high-grade.” Safe-kept guns still pick up finish wear, and bores can hide problems, even a “frosted” bore is rusted, and visible pitting is a bad sign. Photos help, but they also lie through lighting, angles, and selective close-ups.
Condition matters, but it isn’t the whole value story. Make and model, real market data from dealer listings and auctions, and even seasonality can all move the number. Here, you’re going to grade condition with a repeatable, NRA-recognized framework so your description holds up anywhere.
Step 1
If you don’t separate grade language from other value factors, you’ll mislabel the gun and confuse buyers. The fastest way to turn a clean, honest description into an argument is mixing “it functions,” “it looks nice,” and “it’s rare” into one vague grade word.
NRA grade terms show up everywhere people price guns: online listings, shop tags, trade-in conversations, and appraisal write-ups. That shared vocabulary matters because the NRA Modern Gun Condition Standards give buyers and sellers a common reference point, so “Very Good” means the same basic thing across a classifieds post, a counter offer, and an appraiser’s notes.
- Anchor your grading to a shared standard used in listings (NRA language).
- Recognize the common grade words you’ll see (New through Poor) and treat them as shorthand categories-not personal opinions.
- Translate what you’re seeing into percent condition thinking (finish + stock/grips + bore, with function and originality in mind).
- Separate condition from “extra value” factors (rare variants, provenance, accessories, optics) with a quick reminder sentence.
In the wild, most sellers are sorting guns into a few familiar buckets: New, Like New, Excellent, Very Good, Good, Fair, and Poor. Only one of those has a clean, hard line: the NRA Modern standard defines NEW as “Not previously sold at retail, in same condition as current factory production.” Everything below that is basically a shorthand for increasing, visible wear and increasing buyer expectations for small issues or missing “niceness.”
Percent condition is the pricing shorthand most guides lean on because it turns “how worn is it?” into a number you can apply to value. The Blue Book of Gun Values commonly uses a percentage scale, including 100%, 98%, 95%, 90%, 80%, 70%, and 60%, to adjust a model’s listed value by condition percentage. In that NRA and Blue Book context, the percentage is an overall wear estimate tied to visible finish wear, stock or grip finish, and the bore, with practical reality checks for mechanical function and originality, meaning factory-correct parts and finish, because the same-looking wear reads very differently if the gun has been refinished or modified.
Keep one last thing parked in a separate mental bucket: rarity, provenance, and accessories can add value, but they’re not condition. The goal from here is to inspect in a way that supports a defensible grade, not a vibes-based label a buyer can pick apart.
Those labels only work if you can back them up, so the next move is making your inspection setup consistent enough to catch small problems before you ever pick a grade word.
Step 2
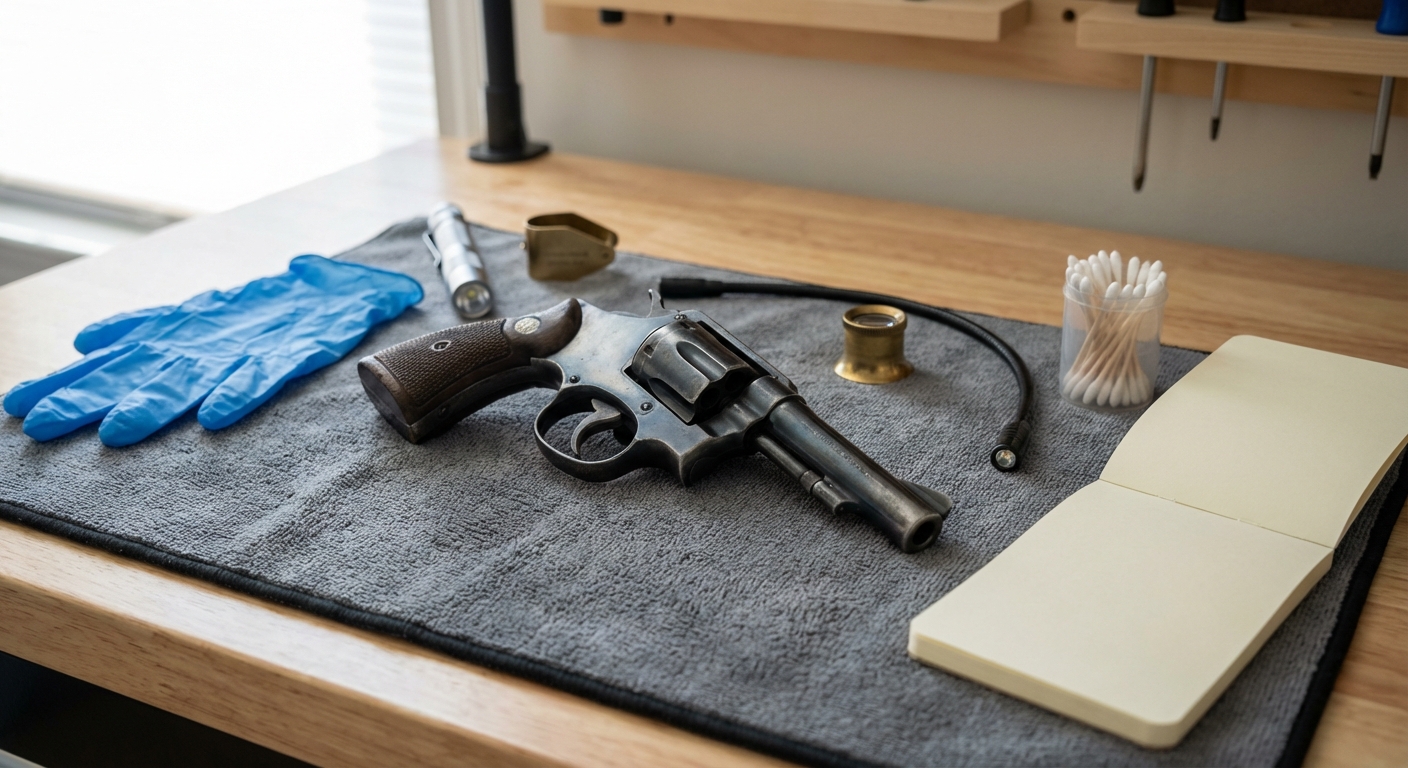
Your inspection is only as accurate as your setup. A sloppy setup is how people miss small wear, miss bore issues, and then confidently overgrade a gun. The friction is usually tiny stuff, dim light, a half-cleared action, no notes, and you end up relying on memory instead of what’s actually in front of you.
- Clear the firearm using the common owner’s-manual sequence (remove magazine, open/lock action, visually and physically inspect chamber and magazine well).
- Control the environment (good light, stable surface, minimal distractions, safe direction).
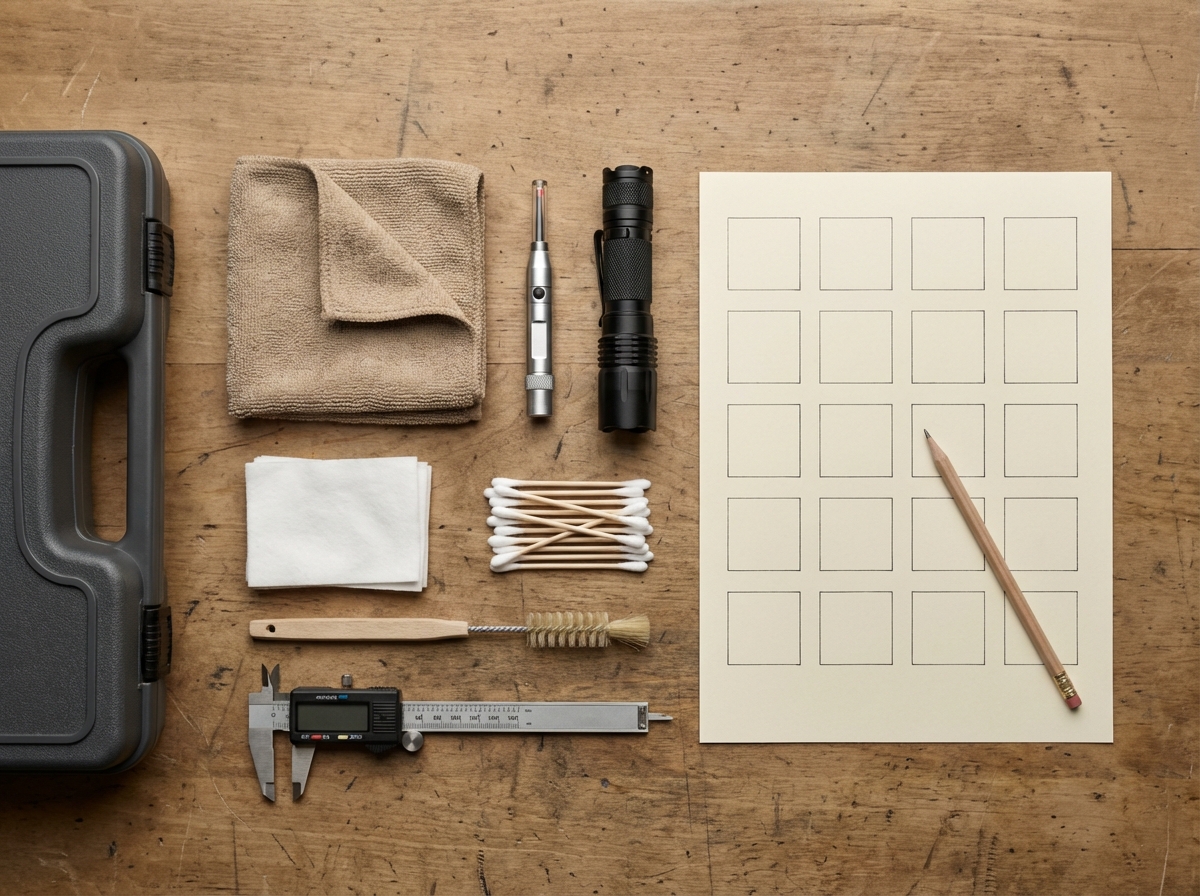
- Gather simple inspection tools (flashlight, microfiber cloth, bore light, magnifier, notepad/phone).
- Document what you see as you go (quick notes + a few clear photos so you’re not relying on memory).
Keep the muzzle in a safe direction the entire time, it’s one of the 10 rules of safe gun handling: “Always keep the muzzle pointed in a safe direction.” If you decide to do a function check, stick to what owner’s manuals commonly require: do it only after you’ve confirmed the firearm is unloaded using the remove-magazine, open or lock action, and visual plus physical chamber and magwell check.
Your documentation can be simple: one note with make, model, caliber, and serial number, plus a few clear photos in good light. That way you’re not trying to reconstruct details later from memory, and it keeps the description consistent if the gun changes hands through a dealer.
Once your setup is consistent, your grading gets consistent, because you’re checking the same way, in the same light, with the same record every time.
With that baseline in place, you can start with what buyers notice first: the exterior. The point isn’t to admire it-it’s to describe what you can actually see (a quick unboxing and inspection walkthrough can help you keep the process repeatable).
Step 3
Exterior condition is what most people grade by first, and it’s also where they get fooled. Your eyes go straight to shiny metal, clean grips, and crisp edges, then your brain quietly rounds everything up to “nice.” That’s how honest holster rub turns into “barely used,” and how a polished-over refinish gets mistaken for a high-condition original.

Here’s the catch: two guns can look equally “clean,” but one is clean because it was carefully carried and stored, and the other is clean because it’s been refinished or had parts swapped. Refinishing is a non-factory rework of the exterior finish, and it changes how buyers perceive the same scratches, edge wear, and thinning. Original wear in the right places reads as history (often a natural patina), fake-new shine with the wrong wear pattern reads as a problem.
This is also why serious evaluations don’t stop at “looks good.” Cash My Guns says condition factors include finish condition, bore condition, matching numbers, and the presence of aftermarket parts, and that appraisers evaluate for pricing using make and model, condition details (including finish), and market data from dealer listings and auctions.
- Scan the metal for finish loss patterns (edges, high points, and holster-contact areas) and note whether wear is even or oddly patchy.
- Separate surface rust from pitting by looking for texture and depth (describe what you see, don’t diagnose causes).
- Inspect furniture and controls (wood/polymer, grips, checkering/texture, screws) for dings, cracks, and tool marks.
- Flag originality concerns by looking for mismatched sheen/color, rounded edges, buffing waves, softened markings, or obvious non-factory parts.
As you do this, stay visual. “Bluing thinning on the muzzle and sharp edges” is useful (especially if you know what a blued finish should look like). “Holster rub on the slide flats” is useful. “Random scratches through the finish” is useful. So is calling out grip wear, flattened checkering, dings in wood or polymer, and buggered screws or fasteners, because tool marks often show someone has been inside the gun.
How to write it down (mini-example): “All areas of the frame show significant thinning of finish, with strong finish remaining only in protected areas.”
That’s the standard to aim for: specific enough that someone else could picture the gun without seeing photos, and specific enough that any originality red flags you spotted are tied to something observable, not a vibe.
Exterior notes are a big chunk of the story, but they’re not the part that decides whether the gun is actually pleasant-or even safe-to run. That’s where basic function and a real look at the bore come in.
Step 4
A gun can look excellent on the outside and still grade lower once you get into function and bore condition, because this is where “condition” becomes real. The problem is these checks feel intimidating, so people skip them, then overgrade a gun that actually has rough cycling, control issues, or a beat bore.
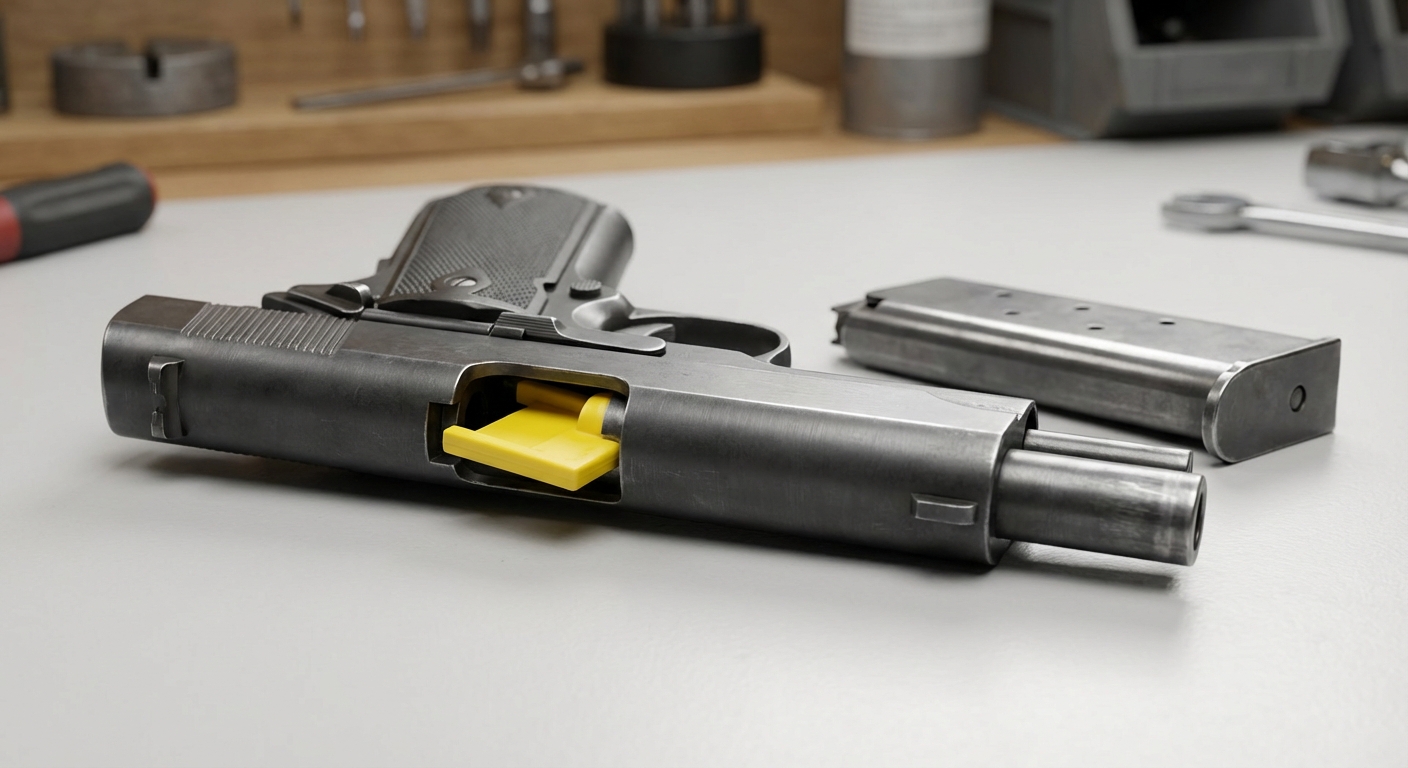
After you’ve confirmed it’s unloaded, do the quick observations owner’s manuals commonly call for, and handle controls the same way you would on the range: in a safe direction and without riding the trigger.
- Cycle the action gently (unloaded) to feel for smooth travel and full return to battery/lockup.
- Verify basic controls (safety/decocker/slide stop or equivalent) engage and disengage normally without forcing anything.
- Check revolver timing basics by slowly cocking/stroking (unloaded) and confirming the cylinder stop locks before full cock (single-action) or before hammer fall (double-action).
- Inspect the bore and chamber with a light for rifling definition, frosting, pitting, and obvious damage near the crown.
- Stop and get a qualified opinion if you see unsafe-function signs, severe pitting, or timing/lockup issues you can’t confidently describe.
If you’re checking a semi-auto, add two simple observations while you do the steps above: magazines should seat positively, latch securely, and drop free or remove normally for that design, and the slide or bolt should lock back on an empty magazine if that’s how the model is built. For trigger reset feel, don’t sit there clicking the trigger repeatedly, use the common function-check approach of controlling the trigger, cycling the action once, then slowly releasing until you feel the reset, and stop there.
When you shine a light through the bore, sharp, well-defined lands and grooves are what you want to see, rounded or washed-out rifling reads as wear in common appraisal standards because it goes hand-in-hand with degraded accuracy and a lower condition assessment.
Separate fouling from damage. Powder and carbon fouling can look like a “dark bore” and is just buildup, corrosion is surface attack on the steel. “Frosting” is commonly used for a lightly rusted bore where the rifling is still visible, but the bore loses that bright, mirror-like look, and sources note it may or may not affect accuracy.
Pitting is the bigger red flag, it often shows up as discrete dark spots or rough-looking areas, and if you can see corrosion or pitting without magnification, treat the barrel as being in poor condition for grading purposes. Also glance at the throat area just ahead of the chamber, a rough, cracked-looking, or heavily eroded transition is a classic high-level sign of throat wear. Finish at the muzzle, nicks, dents, or an uneven crown are easy to spot and matter because they can disturb how the bullet exits.
Write down what you observed in plain language, for example “returns to battery clean,” “safety is mushy,” “mag seats but won’t drop free,” “timing locks late on one chamber,” or “light frosting, rifling still sharp,” so those notes can drive the final grade instead of your memory.
At this point you’ve got the raw inputs-finish, originality clues, function feel, and bore notes. The last step is turning that into one conservative grade you can explain without hand-waving.
Step 5
The best grade is the one you can defend, and that usually means your final call matches the weakest important category, not your favorite feature on the gun. If your notes show a real safety or function problem, or a bore issue that changes how it shoots or cleans up, the overall grade has to follow that reality even if the exterior is impressive.
The hard part is weighting. Cosmetics are loud and easy to see, but they rarely trump timing, lockup, feeding, extraction, or a bore that’s rough enough to matter. A clean-looking refinish also complicates things, it can make honest wear hard to spot, so your grade has to lean on what you observed in function, bore condition, and originality, not just shine.
- Compare your notes to the grade language you learned in Step 1, staying conservative when you’re on the fence.
- Weight safety/function and bore observations more heavily than small cosmetic marks.
- Adjust for originality concerns if your Step 3 notes suggest non-factory changes.
- Record the final grade with a short, specific justification and a few supporting photos.
Start with one question: is it in safe working condition? Under NRA Modern Gun Condition Standards, “Good” requires safe working condition, no broken parts, and no corrosion or pitting that will interfere with proper functioning, and “Good” still allows minor wear on working surfaces as long as it remains safe and functions properly. If it’s still safe but well worn, or you’re seeing visible repair or replacement parts, that pushes you toward “Fair” under the same standards.
Example 1: The bluing and grips look “Very Good,” but your notes include a sticky extraction problem and roughness in the bore that doesn’t clean up. Because “Good” can’t include issues that interfere with proper functioning, the overall grade drops to match the function and bore reality.
Example 2: The outside looks clean and evenly finished, but Step 3 notes suggest a refinish plus non-factory parts, and Step 4 notes show inconsistent ignition. Even if it presents well, the combination of originality concerns and function pushes the overall grade down to what you can justify.
Keep one consistent record: make/model, caliber, serial number, your final grade, and 3 to 5 specific bullet issues (function, bore, originality, and any major cosmetic defects). Add a photo set that matches your notes: both sides, close-ups of marked areas, bore view (if you can), and serial.
A written justification prevents disputes, and it keeps your grading consistent across guns, buyers, insurers, and dealers.
Once you can defend the grade on paper, it’s a lot easier to do the next part honestly: compare it to what similar examples actually sold for and pick a selling route that matches the real-world expectations attached to that grade (and when condition or originality is unclear, consider consulting an expert appraiser for valuation).
Step 6
Your grade only matters if it lines up with the real market, and the market is brutally honest about condition. Buyers pay for what they can verify, not what you hoped the gun would grade when you started.
The friction is that two “Very Good” examples can sell for different money if one is all-original, has the box and correct magazines, or sits in a hotter local market. That’s why you need comps (comparable sales), meaning recent sold listings of the same model and variant in genuinely similar condition, because asking prices are just wishful thinking.
- Pull comps (comparable sales) for the same model/variant in truly similar condition and use them as your reality check.
- Pressure-test your grade against the numbers by asking, “Am I accidentally pricing this like 95% when it’s closer to 90%?”
- Choose a selling route (dealer, consignment, private sale where legal, or online with an FFL transfer) that matches your timeline and risk tolerance—see your options for selling a gun.
- Plan the transfer/shipping basics around an FFL when interstate buyers are involved (high-level reminder only).
Here’s why optimistic grading gets expensive fast. In Blue Book-style math:
- Overgrading from 90% to 95% boosts the indicated value by 0.05 × the 100% price.
- Jumping from 80% to 95% boosts it by 0.15 × the 100% price.
- If the 100% price is $1,000, that’s $50 or $150 of “extra” that buyers will claw back through renegotiation, returns, or a deal that dies in messages.
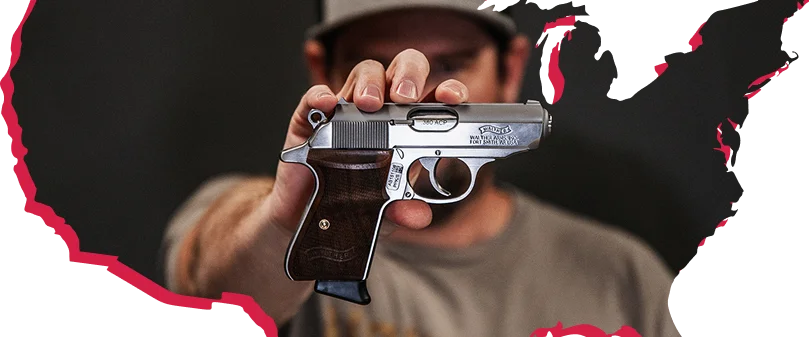
On the logistics side, an FFL (Federal Firearms Licensee) is the normal bridge for interstate transactions because, under the Gun Control Act, a nonlicensee generally may not transfer a firearm to a nonlicensee who lives in a different state, those transfers have to run through an FFL. ATF guidance also allows a nonlicensee to ship a firearm to an FFL in any state, for example to sell to that licensee or to have the licensee facilitate the transfer.
Actionable rule: list with a conservative grade, plus clear photos and blunt notes on wear and modifications. Accurate grading prevents condition disputes, returns, and last-minute price cuts—and helps you figure out what your gun is worth.
All of this loops back to the frustration in the beginning: buyers don’t want a poetic description-they want something they can verify. A conservative, NRA-aligned grade plus good notes is what keeps your listing from turning into a negotiation over what “Good” was supposed to mean, especially when supply and demand affect resale prices.
Quick Checklist and Next Steps
The fastest way to avoid grading drama is a repeatable process and conservative calls, not vibes. The tricky part is weighting what you saw, especially function, bore, and originality clues, then writing it down so your final grade is defensible.
Stick to the same observations every time: finish often thins first on high-contact surfaces while protected areas keep stronger finish, and suspicious wear patterns can hint at refinishing. Bore notes matter just as much, especially when you’re seeing rust-related “frosting” or anything that looks like corrosion or pitting. Pair that with basic function checks like revolver timing, then anchor the final call to a safe-working-condition grade: “Good” when it clearly meets the bar, “Fair” when it barely does.
- Use NRA grade language to describe condition consistently.
- Prep a safe, well-lit inspection so you don’t miss issues.
- Note exterior wear patterns and any refinishing/originality red flags.
- Check function and bore (rifling, frosting, timing basics) and write down what you observed.
- Assign a conservative final grade that stays within safe-working-condition requirements.
Document what you found, be honest in the description, then price and sell off real comps with an FFL-aware plan; if uncertainty about originality or condition affects value, get experienced eyes on it, since appraisals weigh make and model, condition (including finish and bore), and market data from dealer listings and auction results.


")


")


